Warming up to Xcode

As a Mac user and programmer I have been dabbling with Xcode a few times in the past. It was never a primary interest, but a required tool to get started with Objective-C and native Mac GUI development. Objective-C was a curiosity for me. It is syntactically quite different from the C family of programming languages that I usually work with. That also was the reason I never felt comfortable programming in Objective-C. With a syntax so different the investment in time to become proficient didn’t compare well to the expected return.
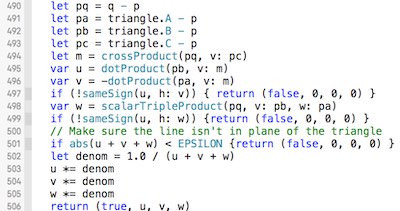
Then Apple announced Swift, a language with a syntax much closer to C and C++. It was open sourced at the end of December 2015, opening the possibility that Swift could turn into a cross-platform programming language; a port for Linux is in the works. IBM is bringing Swift to the cloud (as they call it), which means it can be used server side as well.
Additionally, just like interpretative languages (e.g., Python or Lua) Swift can be used in a command-line environment, promising to become a cross-platform scripting language. All of that, together with the lure of exploring what Apple calls a “protocol-oriented” programming language made it interesting enough for me to take a peek and learn Swift. Once again Xcode came along for a ride. However, partly due to spending more time with Xcode and partly due to recent advances in what Xcode offers, Xcode turned out to be a sophisticated tool that took center stage in many of my programming activities —unrelated to Swift— over the last few months.
But Xcode is an IDE?

Not everyone likes to work with an IDE. Some see it is as too restrictive, preventing them from putting together the right programming environment. Programmers are sometimes[1] opinionated and have their personal preferences that they do not want to compromise on. If you don’t believe me, I would like to refer you to the ongoing editor war, where people fight over whether vi or emacs is the better text editor. That is quite silly as everyone knows the best text editor is BBEdit :)
The alternative to an IDE is to start with a text editor and turn it into a complete development environment. You will need to add a build environment like cmake, gradle or scons, a regular debugger[2], a memory debugger a performance profiler and a code coverage tool. That is a lot of software to manage separately, all of which you get in one package with Xcode.
Xcode: All Tools Together (and Then Some)
Xcode does not only package all the tools together, but it also integrates them in a way that it is difficult, if not impossible to achieve with individual tools.
One example is the integration of the compiler into the editor that allows Xcode to point out compile errors while the source code is being edited. Another is the display of code coverage, created by the integrated unit test tool. These are examples why an IDE is a great programming environment; not so much because the integrated tools in Xcode are better than the best of breed individual tools, but all together they add value that cannot be replicated with individual tools. So, let’s delve a little deeper into what Xcode has to offer.
Editor

The source code editor in Xcode is no slouch and comes with all the bells and whistles. Syntax highlighting, completion suggestions, code folding and so on. However, it goes way beyond that. Since Apple has moved on from the GNU toolchain to llvm, the compiler is available as a library, and thus Xcode can access and display compile messages and static code analysis of the source code as you type. As an example, the following picture shows Xcode complaining about an undeclared variable without the compiler being explicitly invoked:

With that information available in the editor, the times where coding would require multiple time consuming round trips of compiling, followed by fixing the compile errors, are gone.
Source Code Version Control Integration

git has become my favorite source code version control system. Not only for its powerful features, but also for the excellent graphical user interfaces that exist for it on the Mac. Whenever I have to make commits or hunt down changes in the history, I use SourceTree from Atlassian. However, when you are in the trenches, editing and debugging, it is helpful to see right there in the editor what changes were made to the code.
Xcode identifies all changed files in the project navigator by placing a marker “M” next to it (see arrow 1 in the picture below). While Xcode itself indicates change locations in the source code, I use the GitDiff Xcode plugin for a little more functionality. It will indicate changes by placing change bars in the gutter (see arrow 2 in the picture below).

If you let the mouse hover over the change bar, it will show you what the code looked like before the change was made.
To get the big picture, it is sometimes nice to get a side by side view of all changes. If you have the screen real estate and are not using the assistant editor to display related files, you can turn on the side by side change comparison in Xcode.

Memory Bugs

Finding bugs is hard, finding memory bugs is a magnitude harder. Simply because a memory bug often causes mischief at a location in the program that is unrelated to where the actual bug is.
For years valgrind was my tool of choice to find these elusive bugs. It works, but it slows down the execution time. So much, that running it every time during testing in the development cycle becomes infeasible. Thus, memory bugs tend to remain in the code until a much later stage, at which point finding them becomes even harder.
As of version 7.0 Xcode added an address sanitizer to its set of tools. The address sanitizer adds lightweight instrumentation to the executable so that memory violations are caught immediately. During execution, the debugger will stop at the place of the memory violation and provide additional information, e.g., where the memory was freed. Heap buffer overflow and underflow are also detected, as well as generic undefined behaviors.
For a detailed account of all the features refer to Mike Ash’ blog post on this topic.
The address sanitizer’s key feature is its speed. It is fast enough to leave it on for all testing during the development. A great addition to Xcode, well worth to consider it just for this reason.
Unit Tests and Code Coverage

Writing comprehensive tests is often something done last, if at all. Test environments are time-consuming to set up, and there is usually a lot of boilerplate work to be done that can be seen as unproductive. However, good tests are crucial for a robust final product. Support from the IDE for this part of the development process is therefore welcome.
Xcode elevates unit testing to the level of a first-class citizen. It takes a few clicks to set up the environment, eliminating any work but writing the actual code for the test. One great feature that comes with the integrated unit testing is the code coverage tool. Running the unit tests will mark in the editor the number of times a particular block is executed and highlight the portions of the code that have not been executed at all.

For functions that have many execution paths, this is a simple way to inspect that everything has been tested before the code goes out to a customer.
Plugins
Early on I hinted that programmers are opinionated and like to set up their programming environment just right. The developers of Xcode realized that and provided hooks to extend Xcode to allow everyone to change the look and feel and add the tools they would like to see in a programming environment. I found that one great way to utilize the many extensions that have been written and made available for everyone is Alcatraz. Alcatraz adds a menu item to Xcode that makes it ridiculously easy to discover and install plugins for Xcode.
Thumbs Up for Xcode
As with all sophisticated tools, it takes a while to learn the ins and outs. Xcode is no exception here. It packs so many different tools into one package that it seems a bit overwhelming at first. That is why I tossed it aside a few times, and it took a new programming language to make me spent enough time with it to get over the initial learning hump to appreciate its functionality. Try it out if you haven’t yet and stick with it for a while. I’m pretty sure you will like it.
Picture Credits:
- Xcode Icon courtesy of Artcore Illustrations (Nadja Hallfahrt), provided under the CC Attribution-Noncommercial-No Derivate 4.0 license.
- BBEdit Icon retrieved from Barebones’s website.
- Git logo courtesy of Jason Long, licensed under the Creative Commons Attribution 3.0 Unported License.
- Software bug courtesy of Guilherme Tavares, provided under the Attribution 2.0 Generic (CC BY 2.0)
license. - Tested courtesy of and copyright Free Range Stock and Stuart Miles.